[et_pb_section admin_label=”section”]
[et_pb_row admin_label=”row”]
[et_pb_column type=”4_4″][et_pb_text admin_label=”Text”]
Before we get started, it’s crucial to ensure you own or have access to the domain you want to redirect. Learn more here.
Step 1: Create a RedirHub account
To use RedirHub, you’ll first need to create an account. This is a quick and easy process that can be done by visiting our registration page: RedirHub Registration.
Step 2: Add your domain to RedirHub
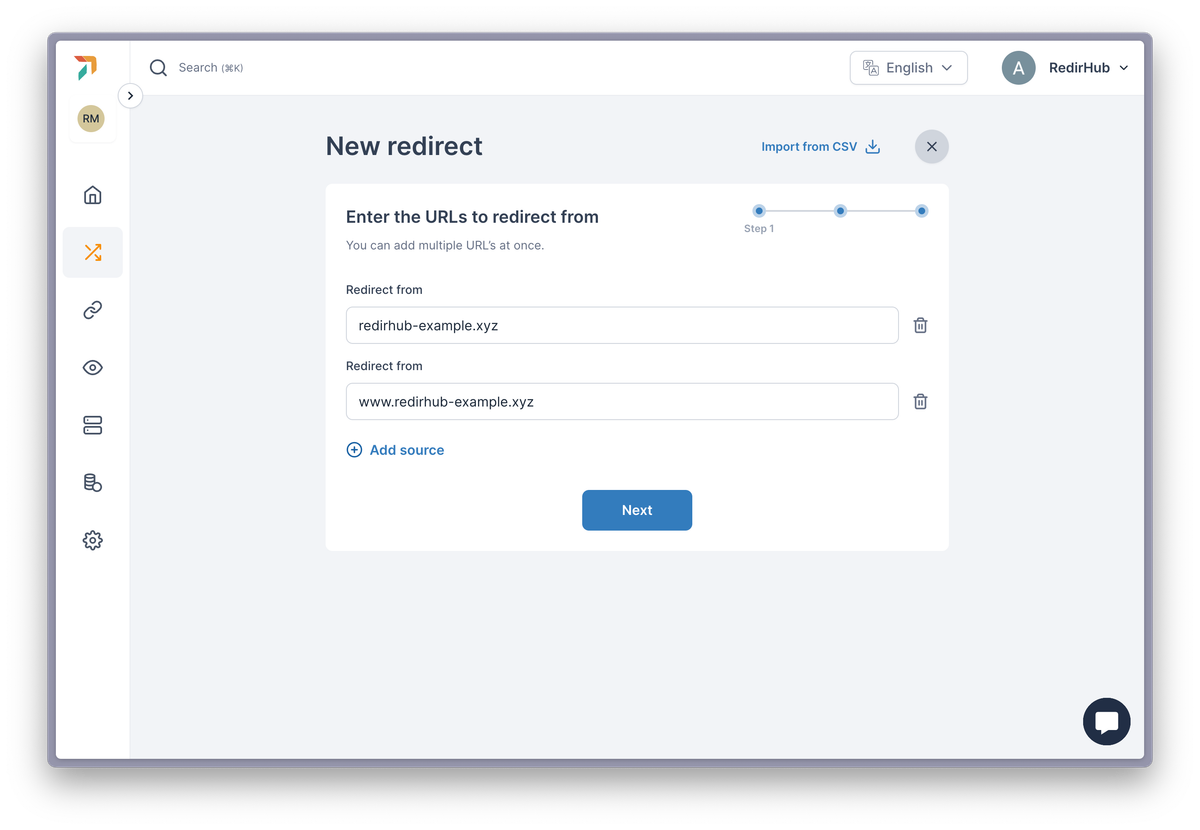
After registering, the next step is to add the domain you wish to redirect. For example, if you have a domain named ‘redirhub-example.xyz’ registered with GoDaddy, you would enter this domain into the ‘Redirect from’ field on RedirHub.
It’s advisable to include both the www version and the apex (non-www) version of your domain to ensure complete coverage.

Once added, you’ll see the Check DNS status button and click it. This will spin and show that the detected DNS values differ from the required ones, showing that a DNS change is necessary.
Step 3: Making the DNS change
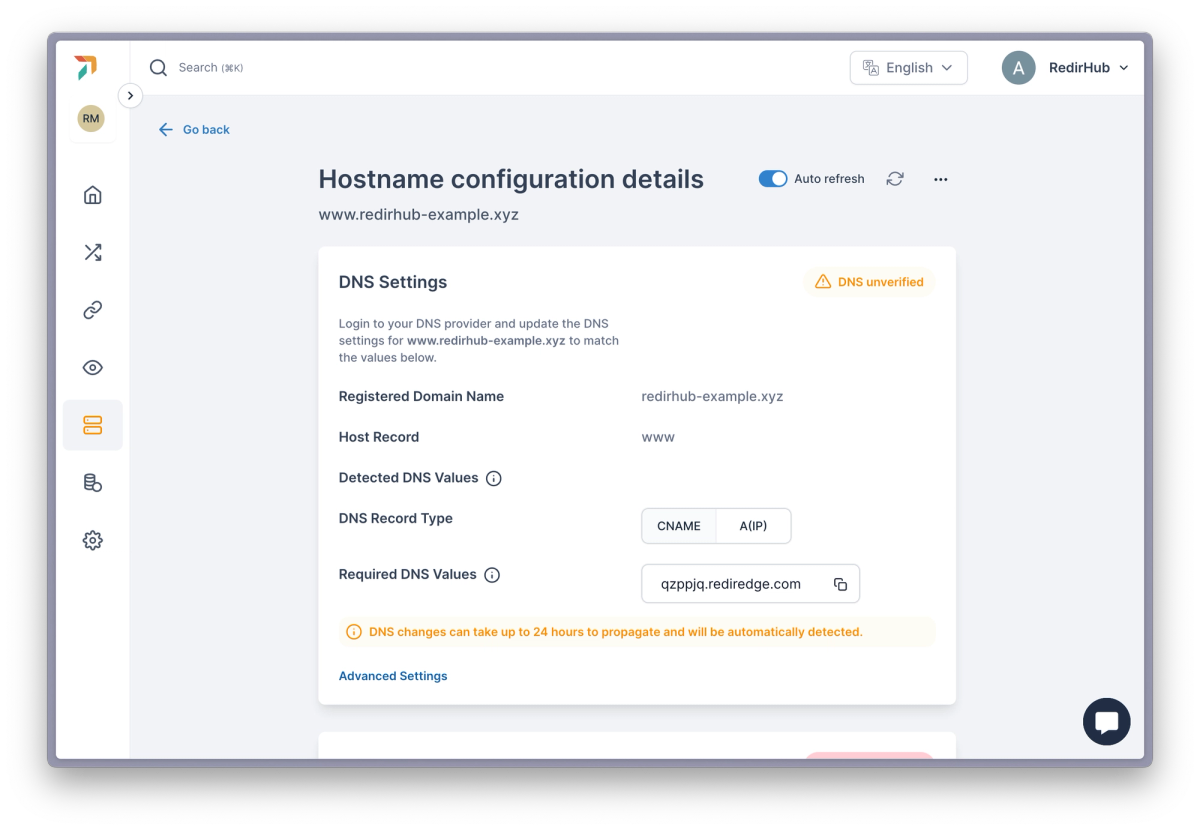
This step involves updating the DNS settings with your domain registrant or DNS provider. Each provider has a slightly unique process, but you’ll need to access your domain’s DNS zone settings and make the changes as instructed by RedirHub.
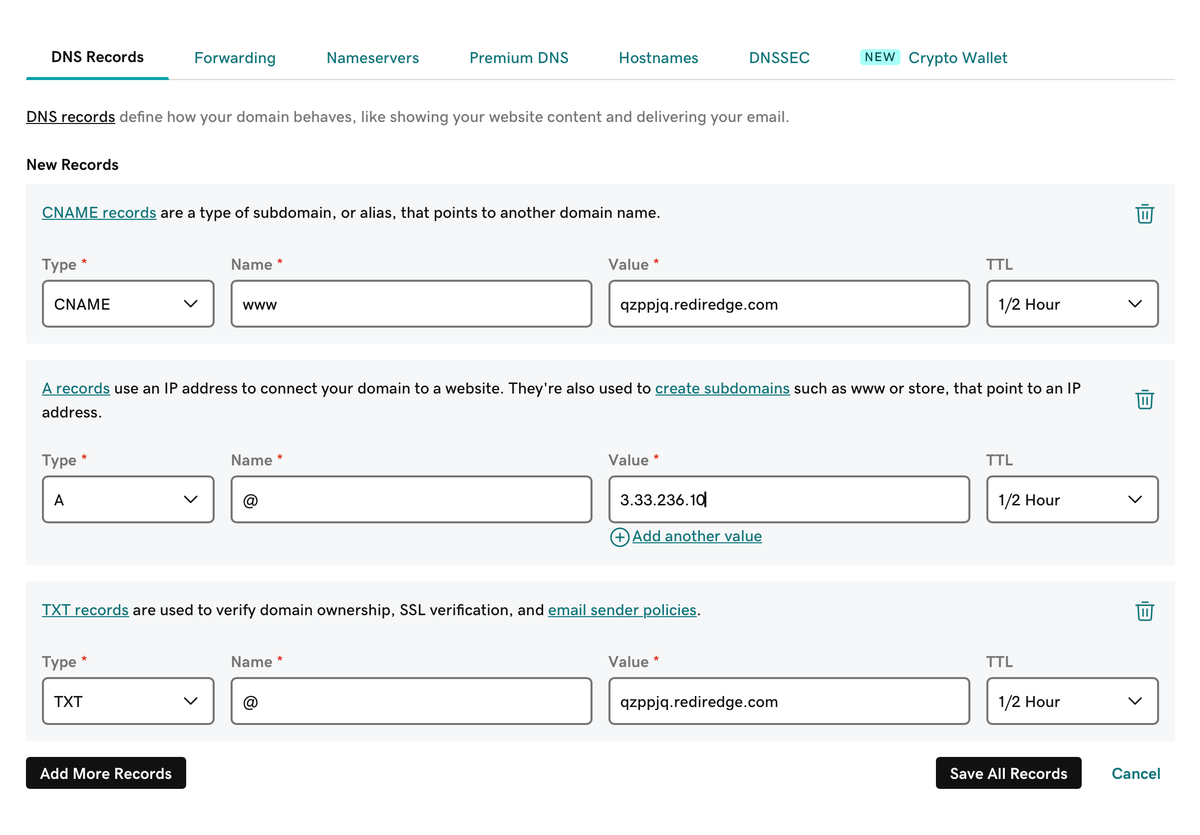
For precise guidance, contact your domain provider directly and share the DNS changes required by RedirHub. Most providers offer support and can assist you in making these updates.
Step 4: Waiting
Once the DNS changes are made, there is a propagation period during which the updates spread across the internet. You can track the progress of these changes using a tool like WhatsMyDNS. For our example, you can check the status of ‘www.redirhub-example.xyz’ here: WhatsMyDNS – RedirHub Example.
DNS propagation can take up to 24 hours. When the process is complete, RedirHub will detect the changes and display a green checkmark next to the DNS records, showing that everything is set up correctly.
Step 5: Done!
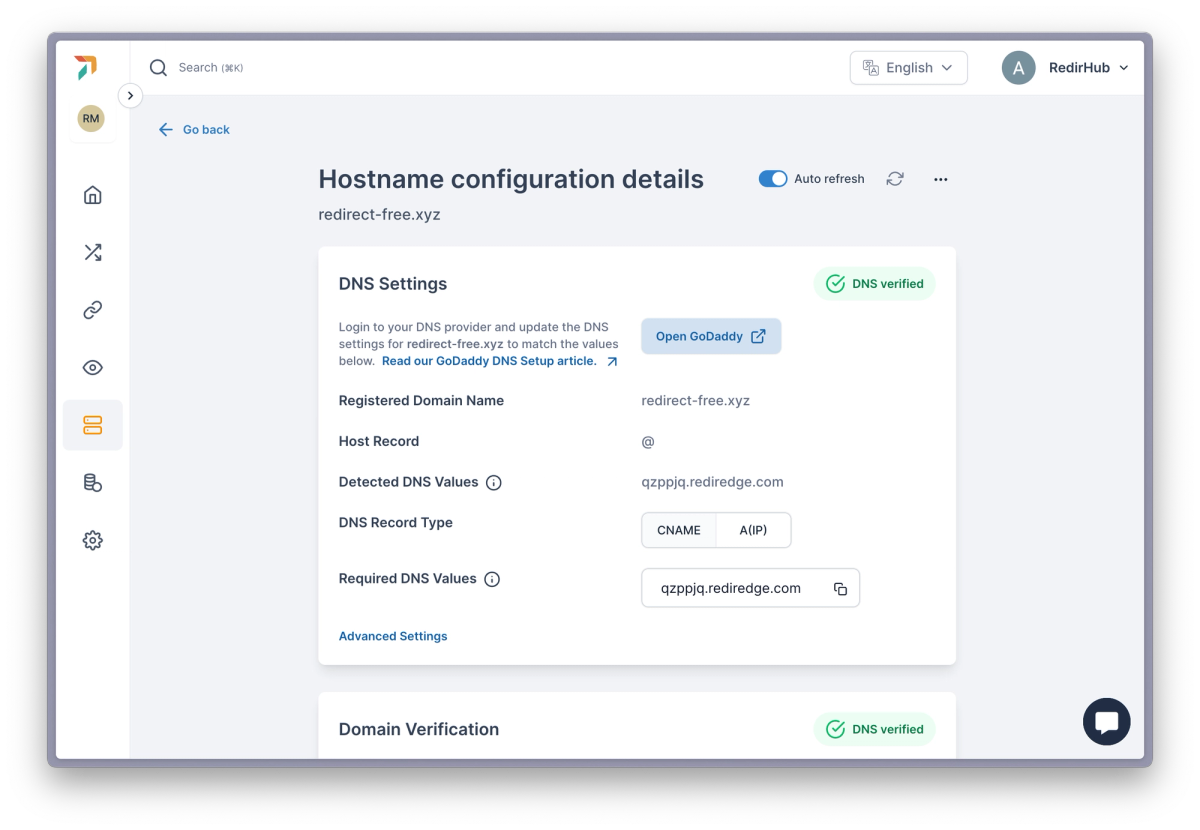
Once you see the green “DNS Verified”, your domain redirection is fully operational. Traffic will now flow seamlessly through RedirHub, ensuring your redirects are working as intended.
Your redirection is now complete!
[/et_pb_text][/et_pb_column]
[/et_pb_row]
[/et_pb_section]